Choose a readable leader
Default: lead on a new save.
 SWAT
SWATReason: the gives you one projectile and a magazine cycle to watch before recruits widen the offer pool.
 Pistol
Premise: no mission, arena, mode, or Torment condition is forcing a different opening job.
Cost: the Pistol’s recorded range bonus falls away with distance, and a readable opening does not provide every form of control or support.
Alternative: lead for a close-range spread, or for repeated electric control.
 Tank
Tank Engineer
- Choose a leader whose opening attack you can identify while fighting alone.
- Check that one Weapon’s attack shape, range profile, and reload.
- Recruit one Survivor for the first missing job you can see.
- Use the final slot to reinforce that plan or activate a useful pair effect.
This guide covers Full Release 1.0. Mission objectives, modes, arenas, and Torment settings can change the useful opening job or the work a recruit must perform.
Change the default
The leader fights alone until a successful SOS interaction produces a recruit choice. Start with when learning the run is the main goal. Open SWAT’s record and follow the Pistol link when you need its exact range and cycle fields.
Choose when you want the opening question to be whether you can keep a spread close enough to connect. The cost is a one-shot magazine and the chance that only part of the spread reaches one target. Choose when repeated hits and electric control are the intended lesson. The cost is that control does not automatically solve a durable priority target.
Later-unlocked Survivors are valid leaders when the run has a specific purpose. Open that one Survivor in the complete roster and follow its starting Weapon into Zombiepedia. Do not turn all nine openings into a ranking: the useful choice still depends on the objective, spacing you can hold, and cards that appear.
Use a Weapon record as a premise, not a forecast. Accuracy, critical hits, player bonuses, enemy defenses, status damage, later upgrades, and partial hits all change what reaches a target.
Pick the first recruit
Recruit for the first visible failure, not for a fixed roster order.
- If enemies close before your opening attack clears them, add control or broader coverage.
- If the squad loses health faster than it can stabilize, inspect recovery and defensive effects.
- If ordinary groups fall but priority targets linger, add focused damage that can reach them consistently.
- If none of those problems is present, choose a recruit whose pair effect improves a weapon or ability already in the run.
Open the Survivor roster before the run to inspect complete kits. During the run, read the actual recruit and upgrade cards. A correct role in the abstract can still be a poor choice when its useful pieces have not appeared.
Pick the second recruit
Use the final slot to make the first two Survivors easier to play. Do not add a third damage family only because it is available.
Check the owner record for any pair effect you plan to use. Four gates can matter: the owner reaches the listed Rank, the permanent synergy node has been purchased, the named Ability is present in the current run when the effect requires one, and the combat condition in the description actually happens. Reaching the Rank does not buy the node. Pairing the two Survivors does not supply a missing Ability.
The cost of every recruit is a wider choice pool. More weapons and abilities can improve coverage, but they can also reduce how often the upgrade you want appears. Delay the final recruit when the leader’s main path still needs a key step and the current pair already handles the wave.
Sample squad plans
These plans define jobs rather than promise a universal best team.
Learn a direct opening, then add control
Lead or . Recruit when the opening attack is understandable but enemies still compress the available space. Keep the last slot open until the run shows whether it needs recovery, more priority damage, or another control effect.
Benefit: the leader’s attack remains easy to identify while the first recruit adds a different job. Cost: adding control does not guarantee enough damage for every target. Alternative: recruit another direct attacker when spacing is already safe and the unresolved problem is a durable enemy.
Start with control, then protect the run
Lead when you want the opening experiment centered on electric control. Add or only after reading which available kit addresses the run’s actual failure.
 Medic
Medic Mechanic
Benefit: the squad can add explicit support language around a control opening. Cost: support choices can slow immediate damage growth. Alternative: take a damage-focused recruit first when enemies survive long enough to overwhelm the control.
Build around a later unlock
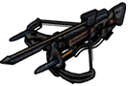
Lead only when you want to test the and can keep the space its attack needs. Otherwise, recruit after a leader with a more familiar opening has established the run. Inspect single record before relying on one of its pair effects.
 Ranger
 Crossbow
Benefit: the run tests a specific opening-distance question. Cost: forcing a later-unlocked kit into every leader slot ignores arenas and offered cards. Alternative: keep as a recruit and let a familiar leader carry the opening.
Change the plan
Change course when one of these signals appears:
- The leader cannot stay in the distance band you selected.
- The first recruit adds effects that never solve the visible failure.
- The upgrade pool has become too wide to improve the attack carrying the run.
- A mission, mode, or difficulty condition changes what success requires.
When spacing fails, change the leader or add control before changing every weapon choice. When the upgrade pool is the problem, delay a recruit rather than blaming its entire kit. When the objective changes, define the new job first and rebuild the squad around that job.
FAQ
Is the highest-looking Weapon number the best leader?
No. One stored field does not measure safety, coverage, sustained output, status effects, partial hits, or how often the Weapon connects in your run.
Should the leader always stay in its best recorded distance?
Use that band as a starting hypothesis. Switch when the arena, enemy pressure, or attack shape makes the position unsafe or unreliable.
Should every squad include support?
Only when a support effect solves a problem the run has. If the squad already stays stable, use the slot for the missing damage, control, or pair effect instead.
When should I delay an SOS recruit?
Delay it when the current squad is stable and the leader’s important weapon path is still incomplete. Recruit when the added job is worth widening the choice pool.
Where can I inspect every kit and pair effect?
Use the Survivor roster. Open one row at a time and copy the page link when you want to return to the same Survivor.