Start with one readable run
Default: on an Arena you are still learning, use Default, Difficulty I, Horde 1, and wave 1.
Reason: Default and Difficulty I have neutral stored changes, so the Arena base and its actual wave schedule are easier to separate.
Premise: no Mission, Achievement, or unlock goal requires another mode, and you have not isolated a repeatable failure yet.
Cost: this attempt postpones progress tied to another mode or a higher difficulty.
Alternative: when one failure is repeatable, choose the mode that matches the goal and move to Difficulty II. Use Difficulty III only after health, contact, and lost-space pressure all have answers.
This guide applies to Full Release 1.0. It uses the five current Arenas, their seven internal modes, and three difficulty records. It does not rank squads, store another Arena, or calculate an exact combined multiplier.
Choose one next setup
Enter the setup that just ran, then name the next goal and its last failure. The answer changes one current context; it never adds a second setup.
The decision uses a strict hold rule. If you report a failure but also say you are still learning the wave, repeat the current mode and difficulty. Once that failure is isolated, the goal chooses one mode and readiness chooses one difficulty. The resulting link opens that single context in Arenas, where you can select the exact wave.
Match your goal to one mode
Choose by objective, not by which label sounds harder.
- Default is the clean starting point for learning an Arena.
- Hardcore is the shorter fixed run. Its stored mode changes add pressure before the selected wave is considered.
- Extermination advances after the fixed enemies in the current wave are cleared.
- Endurance is the continuing run for sustained pressure.
- One hit is the optional no-hit attempt; any hit ends the run.
- Infinite uses the Endurance wave base with its own optional rules. This guide does not state an exact spawn factor.
- Boss Rush gives a ten-minute preparation schedule before the final Arena boss.
| Mode | Game description | Stored mode changes |
|---|---|---|
| Default | Standard game mode that lasts up to 20 minutes. Can you survive the night until dawn? | None |
| Endurance | Test your skills in a mode with no time limit that gets progressively harder the longer you play. | Spawn intensity -0.2 |
| Hardcore | The standard game mode... on steroids! Get ready for a much tougher but shorter challenge. | Enemy health +0.5, Movement speed +0.1, Enemy damage +0.25, Spawn intensity +0.2 |
| Extermination | A wave-based mode in which you must annihilate all enemies in the current wave to advance to the next ones. The lower your time is, the better! | Spawn intensity +0.1 |
| One hit | Train your reflexes and survive a 5+ minute gauntlet of enemy attacks where any single hit ends your run. | Spawn intensity +1 |
| Infinite | Break the limits! The rules of this mode works in your advantage: Most achievements are disabled, but there's no item limit. | None |
| Boss Rush | Use the first ten minutes to prepare for a fight with the most powerful enemy of each area. The faster they fall, the better. | None |
Infinite uses the Endurance wave base and a separate spawn-intensity rule. This guide does not publish an exact combined value for that rule.
The mode record and the wave record answer different questions. A mode can change the objective, duration, or enemy-side inputs. Its wave file decides which enemies arrive, whether the stream is continuous or fixed, and when delayed streams begin.
Set difficulty from readiness
Use Difficulty I while the wave itself is still unfamiliar. Use Difficulty II after one failure is repeatable and understood. Use Difficulty III only after the squad already has an answer for durable enemies, dangerous contact, and lost space.
| Difficulty | Health | Movement | Damage | Spawn | Stored Elite anchors at 0 / 25 / 50 / 100% | Separate runtime bonus |
|---|---|---|---|---|---|---|
| Difficulty I | 0 | 0 | 0 | 0 | 0% / 0% / 1% / 5% | 0 percentage points |
| Difficulty II | +0.65 | +0.1 | +0.35 | +0.5 | 2.5% / 4% / 7% / 15% | 0 percentage points |
| Difficulty III | +1.25 | +0.2 | +0.7 | +1 | 4.052% / 8% / 12% / 25% | 5 percentage points |
These are stored inputs. The guide does not fill the gaps between Elite anchors or add the runtime bonus to a calculated chance.
The table deliberately keeps Elite anchors and the runtime bonus separate. Those are stored fields for the selected difficulty, not a calculator. The site does not estimate a value between anchors or publish an exact combined Elite chance.
If a higher difficulty produces two new failure types at once, return to the last readable setup. One repeated cause gives you a useful next action; several new causes do not.
Read the four input sources
Enemy health, movement speed, damage, spawn intensity, Experience, and Tempo each have four visible sources on the Arena page:
- the selected Arena base;
- the selected difficulty change;
- the selected mode change;
- the selected Horde factor.
| Dimension | Arena base | Difficulty change | Mode change | Horde factor |
|---|---|---|---|---|
| Enemy health | 1.5× | 0 | 0 | 1× |
| Movement speed | 1× | 0 | 0 | 1× |
| Enemy damage | 1.2× | 0 | 0 | 1× |
| Spawn intensity | 2× | 0 | 0 | 1× |
| Experience | 1× | 0 | 0 | 1× |
| Tempo | 1× | 0 | 0 | 1× |
Read each column as a separate source. Open this Arena to change one context and inspect its selected wave.
Read across one dimension instead of turning the row into a universal “difficulty multiplier.” Bio Lab can raise its own base while Difficulty I and Default remain neutral. Another dimension in the same setup may still remain at 1×. Keep those inputs separate; this guide does not reconstruct an exact combined result.
The selected Arena record is enough to identify that source. Open another Arena only after the current failure is understood; the guide does not create a multi-Arena table. These inputs are not a promise of the exact number visible over an enemy after every later game rule.
Inspect the selected wave
After choosing the setup, open its Arena link and move to the wave where the run first became unrecoverable. Read the wave separately from the four input sources.
The opening wave below shows why mode choice can change the run before difficulty has done anything. These are internal mode states of one Arena, not several Arena records.
| Mode | Opening wave | Stored spawn streams |
|---|---|---|
| Default | 1:00 · danger 1 | 2/s; 0/s |
| Endurance | 1:30 · danger 1 | 2/s |
| Hardcore | 0:30 · danger 1 | 4/s |
| Extermination | Clears with the fixed group | ×10; ×5; ×5 |
| One hit | 1:00 · danger 1 | 3.5/s; 0.5/s; 0.5/s after 30s; 0.25/s after 20s; ×1; ×1 |
| Infinite | 1:30 · danger 1 | 2/s |
| Boss Rush | 0:30 · danger 1 | 0/s; 2/s; 0.3/s; 0.1/s |
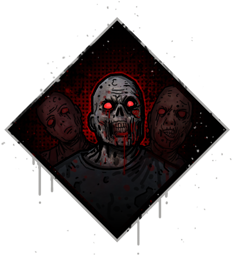 Basic Zombie
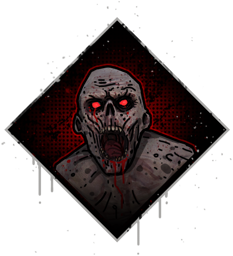 Runner
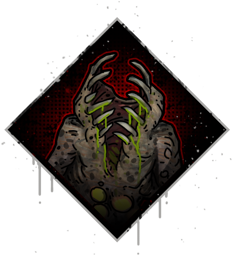 Spitter
 Butcher
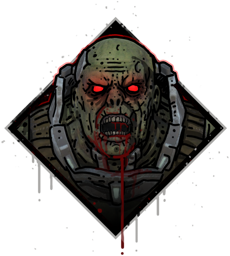 Charger
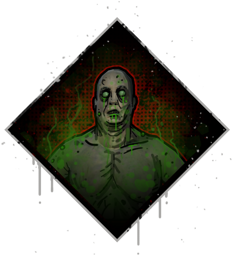 Boomer
Use the stream kind correctly:
- A continuous stream has a stored rate and may have a delay.
- A fixed stream has a stored count. In Extermination, the current fixed group must be cleared before the next wave.
- The rate is a schedule input, not a promise of the exact number alive on screen. Limits, delays, and enemy removal still matter.
Diagnose one repeatable failure
Keep the same Arena, mode, difficulty, Horde level, and wave until one of these causes repeats:
- Enemies survive too long: inspect Enemy health and the exact Enemy rows in that wave.
- Contact damage ends the run: inspect Enemy damage, movement speed, and the Enemy’s stored attack fields.
- The squad loses safe space: inspect spawn intensity, stream rate or count, delays, and control responses.
- The build finishes too late: inspect the mode’s schedule before changing the squad path.
Then change the single condition named by the decision answer. If the failure does not repeat, keep the current setup; changing mode and difficulty together would hide which choice mattered.
Avoid the common mistakes
Opening another Arena while deciding. Keep one current Arena context. The decision needs the failure from that run, not a second record.
Treating mode and wave as the same field. The mode owns the objective and stored changes. The wave owns its Enemy streams and timing.
Rebuilding the old combined formula from memory. Use the stored inputs and qualitative Infinite boundary without turning them into an exact combined result.
Reading Elite anchors as flat phases. They are stored points. This guide does not fill the gaps between them.
Raising difficulty before the failure is isolated. Repeat the current setup when the same run has not produced one stable cause.
FAQ
Which setup should I use to learn a new Arena?
Use that Arena on Default and Difficulty I. Start at Horde 1 and inspect wave 1, then keep the setup steady until one failure repeats.
Is Hardcore only a shorter Default run?
No. Hardcore has a shorter fixed schedule and its own stored health, movement, damage, and spawn-intensity changes.
When should I choose Difficulty III?
Choose it after the current plan already answers durable enemies, dangerous contact, and lost-space pressure. If a lower setup still produces an unclear failure, repeat it instead.
Why does the guide not show one final multiplier?
The Arena page shows the Arena, difficulty, mode, and Horde inputs separately. This guide uses those sources to identify what changed without claiming one final number.
Where do I inspect the exact Enemy that caused the loss?
Open the selected wave in Arenas, then follow that Enemy’s link to its stored rank, control, and appearance fields.